

How to Replace Window Putty or Beading, Reglazing a window.
If you've arrived here direct from a search, you might want to read the full set of pages starting here
This also applies to replacing glass in a window
BEFORE starting on the putty, do all the wood sanding you need. The putty will still be soft when it comes to painting so you don’t want to mess it up with any last minute sanding.
Putty when reconditioning a window
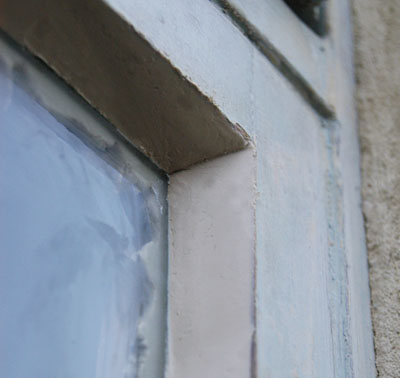
Close attention has to paid to the putty / beading seal against the glass and the frame. You can usually see from the inside if the putty has pulled away from the glass as the moisture getting in there will be causing visible mould. If the seal is broken and water gets in then timber rot will follow.
The condition of the putty should be assessed. It might need totally stripping off or just localised repairs. And don’t forget the inside seal as well, condensation on the inside can get behind this and eventually cause rot.
Cracked and loose putty should be removed. Careful scraping and chipping might be needed so watch out that you don’t damage the glass.
Tips for how to remove old putty
Heat will soften the putty BUT be careful! Excessive, localised heat on the glass will cause it to crack. So if using a heat gun, protect the glass with a shield (eg. a piece of hardboard). You can also use a steamer with a fine nozzle. Use a blunt chisel as a scraper and you will find by heating, you've knocked 2 hours off the job.

The glass should be shielded from the heat unless already broken as in this case.
 Areas where the putty has been completely removed should be coated with shellac. This will prevent the linseed oil in the putty being soaked out before it has had chance to start setting. The putty is likely to crack and / or ripple if this step is missed out. Shellac dries quickly so there's no excuse for missing this step.
Tips on How to Putty Windows
Using linseed putty is a bit of dying art, but it a skill that you can be proficient in by learning on the job. It is a seemingly strange material to work with and a very tactile art that’s difficult to learn intellectually. Here’s a few pointers to help you let your hands learn.
Linseed Putty Explained
Linseed putty is the traditional glazing compound; it’s been around for hundreds of years. It is a simple blend of raw linseed oil and fine chalk dust mixed together into a doughy consistency. The linseed polymerises when exposed to oxygen, this is a slow process hence the putty takes weeks/ months to fully harden.
Linseed putty consistency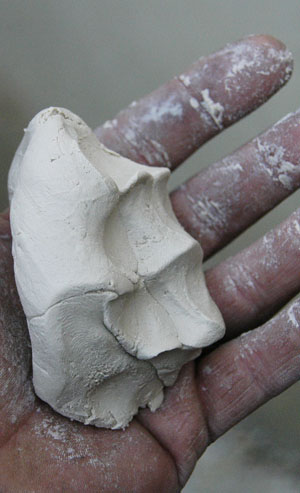
Getting the consistency of the putty right will make the job much easier.
The tub you’ve bought should have the right mix of chalk and linseed oil but it might have sat on the shelf so long that it has started to settle out. You might have a skim of oil just under the paper disc, in this case remove the whole contents and kneed it all back in. If you just dip in without doing this the putty will be too wet, it’ll be terribly sticky, difficult to work and prone to cracking as it cures.
If it still feels a bit too wet (sticks readily to your hands and can't be easily worked) pat it out on to a cloth or newspaper and wrap it up. The excess oil will soak out.
If it’s too dry, it won’t stick where you need it too, so extra linseed oil can be added.
It’s difficult to explain “too wet” and “two dry”, it’s something you’ll have to get a feel for yourself.
The other thing that affects fresh putty consistency is temperature. Warm it up either by working it your hands for a while (or for large quantities you can pop it the microwave for a few seconds). This will soften it up to a good workable consistency.
First steps to glazing with Linseed Putty.
Assuming you done all the prep, cleaned and degreased the glass, shellac on the timber and got your putty just right.
Applying the putty
The first thing to do is press the right amount (plus a little excess) of putty in to the corner of the rebate.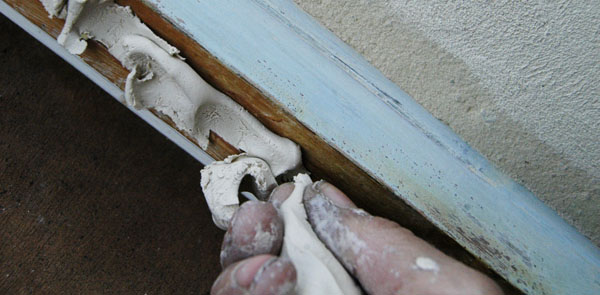
Putty like an old time pro: If you can manage this perfectly you’re doing better than me. Take a ball of putty in your hand, squeeze it through to your thumb and fore finger, use your thumb to wipe it in to the corner.
Two handed: Feed from a ball or sausage shape in one hand and press in place with your other hand. A putty knife might be easier to do the pressing in, either sliding along or with short pulls from the glass to the frame.
Slow but steady: Put the putty on the knife and wipe it on from the glass to the frame. The problem with working slowly is that the putty will cool down making wiping the joint difficult. A bit of gental heating with a hot air gun should get you back on track.
The object of all of these is to get the putty roughly in place. It doesn’t have to be neat or pretty.
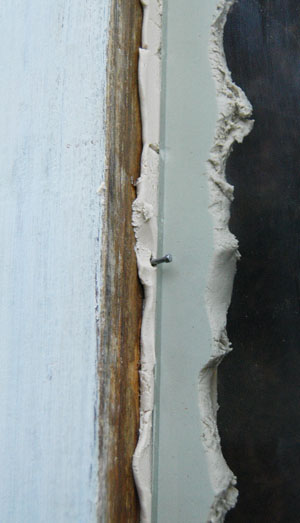 The glass can then be pressed in to place, gently, pressing around the edges a number of times until the glass is fully bedded. Pins of sprags should be pressed (not hammered) in to hold the glass in place.
With a fresh ball of putty then worked up to temperature, putty is then applied for the outer seal.
Once you’ve done one side it’ll need wiping straight away, leave it too long and the putty will have cooled and be difficult to work.
Second Step - Striking a Good Putty Seal
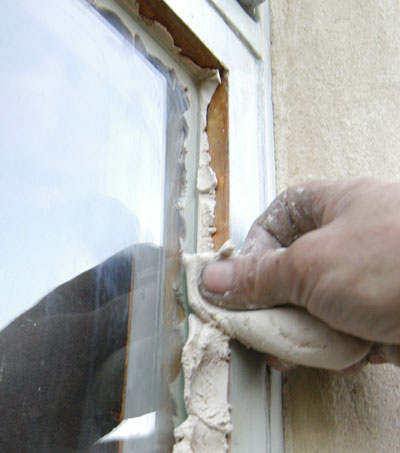
Ignore anything you might have heard about wetting the putty knife blade. What you need is a clean, preferably polished, stiff blade.
 Don’t faff about, use plenty of pressure with the blade at about 30 degrees to frame and angled to form the chamfer you need.
Press the putty down and draw the blade along with a steady motion. After you’ve done it a few times it starts to get easier.
You should end up with a nice neat fillet with the excess in a line on the glass and frame, this should be easy to pull off
If the putty pulls away behind the knife it is probably too cold. Pull it off and re0work some heat in to it. (Or cheat and gently warm it with a hot air gun)
If it’s not neat enough for you, then go over it again but keep the pressure on the blade. If you just dab at it then it’ll end up worse.
Moving on to the next side it’s a repeat of the first but this time you have a mitred corner to deal with. Work away from the corner is easiest, pressing the end of the blade in to form the mitre the pulling away from that point.
The last mitre joint you have to do going towards the first side you did. It’s hard to explain but you rotate the blade and finish by swiping up the mitre from the glass to the wood.
 Don’t expect to get all this right first time, it is a craft that your hands rather than your brain has to work on. Practice will eventually make perfect, in the meantime just aim for acceptable.
Repairing old putty
If it’s just the seal to glass in parts that have gone and the rest of putty is sound then: The top edge of the fillet can be scraped back, the glass cleaned (methylated spirits is good for this), the edge can be brushed with warm linseed oil (boiled) and allowed to be pulled in to the gap by capillary action, new putty forced in and shaped.
Minor cracking in stable putty can be repaired by forcing in fresh putty as a filler.
Timber beading repair or replace
Timber Beading is a weak point, with an extra two surfaces that need to sealed the opportunities for de-bonding and water ingress are doubled. Small gaps can be filled with putty and a small extra fillet of putty added from the top of the beading to glass.
Rotten beading should be replaced. This will need the putty behind the bead scraping off so the new bead can be fully bedded and pressed in to fresh putty. Take care when re-pinning the beading that you don’t catch the glass. Make sure the end mitres of the beading are sealed.
Previous: Filling and sanding window repairs
Please post any questions, comments or suggestions over on the blog
Window repairs intro and index
Investigating the extent of damage
Making good a timber frame or sash
Other Window problems and considerations including sash window double glazing
Filling and sanding window repairs