

Making good, repairing timber window frame or sash
If you've arrived here direct from a search, you might want to read the full set of pages starting here
Including: Cutting and shaping to fit in new pieces. Hardening timber to hold adhesives and fillers. Repairing loose joints on window sashes.
Splicing in new pieces of timber
This is the main part of the repairs to the window frame where rot has destroyed whole or part sections of timber.
Small sections can be done with just filler. Have a read of “Filling repairs” for the details.
Preparations to splice in new wood to replace rotten sections
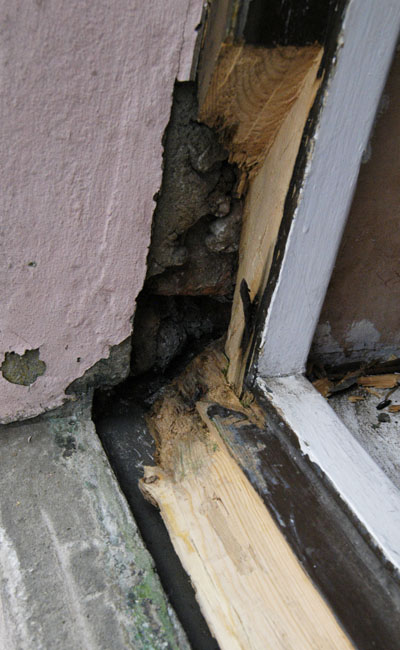 First cut and shape the old timber so the space left is as regular as possible. All soft timber should be removed and to get a regular shape, some good wood might have to be removed as well. If it looks like a lot of good wood might have to go then consider splicing in two new pieces.
We need a regular shape so it’s easier to cut the new pieces to fit the hole reasonably accurately. A saw, dovetail or tenon and chisel is all you need to do this but an electric “multi cut” saw can speed things up a bit.
Wood hardener can then be applied to any end grain or edges that might not be perfectly good timber but that are sound enough. A few coats makes sure it will be absorbed deep in to the wood so any glue or filler will have a good substrate to stick to.
Whilst the hardener is curing, it’s time to cut and shape new pieces to fit.
Timber for effective repairs to windows
The timber you use for this is critical to the longevity of the repair. Avoid using the “white wood” sold in DIY sheds this will be low density, fast grown spruce, new pine would be better. However old pine with close grain is better still, it’ll depend on what you to hand (I keep useful bits timber from scrapped furniture or other dismantlings). If you have to buy new then “redwood” pine from a Timber merchants will do the job but may not be fully seasoned so is liable to shrink. (see the timber buying sections)
Fitting new pieces of wood to repair windows
 The new piece should be a good touching fit all around in the gaps. It can be a little fiddly to get a good fit on chiselled surfaces but gaps of up to 1mm in parts won’t cause problems. The pieces can stand proud of the final surface, to be trimmed or sanded back later.
The new pieces should be drilled to take screws to hold the pieces in place as the glue sets. I use No. 6 screws, long enough to get a good grip in the old timber. The holes can be counter bored to get to the right depth if you haven’t got a selection of screw lengths available.
Note: Make sure the screws will be clear of any glass.
I use polyurethane wood adhesive. It expands as it cures filling any little gaps, it makes a good water tight bond and sets quickly (10 - 30 mins to bond 1hr to 2hrs before the excess can be cut back).
Glue up and screw the pieces in place, making sure the screw heads are screwed below the finished surface or they can be removed after the glue has cured.
 The glue will have expanded and squeezed out of the edges. This can be easily trimmed back with a sharp chisel. The chisel can also be used to clean out glue from any edges that aren’t a good fit, to a depth of 1mm ish, this will allow any filler to get a good grip and leave a good finish when sanded back.
A number af pieces spliced in to a corner. Bottom piece wedged up while the glue cures.
Previous: Paint stripping windows
Please post any questions, comments or suggestions over on the blog
Window repairs intro and index
Investigating the extent of damage
Making good a timber frame or sash
Other Window problems and considerations including sash window double glazing
Filling and sanding window repairs