

How To Fix a Rotten Beam / Joist End
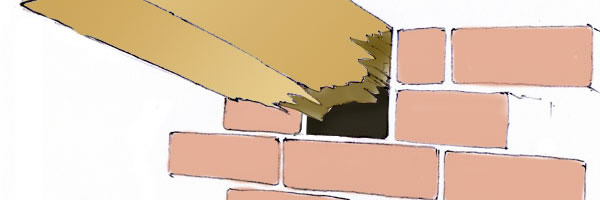
Where a Joist or Beam goes in to a brick or stone wall there’s a high risk of wood rot. Under floors and in cellars the wall can be damp due to condensation or moisture passing through from outside. In our case, in the Whitby Cottage, we had a leaking roof that let water straight through to the wall where two of the attic floor joists sit.
However the moisture gets there, it travels straight up the end grain and never gets a chance to dry out. The constant moisture is a perfect habitat for wet rot and dry rot.
Whatever the cause of a rotten beam or joist end it's a problem that needs fixing. Before I show exactly how I fixed our joist ends here’s a comparison of the other joist end repair techniques I've considered.
Note: With all beam/joist end fixing methods: The beam or joist may be intended to provide lateral restraint to walls or roof structures. If it is then the fixed end will need tying in to the wall or timbers.
Joist Repair Plates
These are two lengths of “L” section steel that are screwed on to the both bottom edges of the joist. They need to be long enough to go in to the wall and past the rotten timber so the screws can get a good hold. The length also reduces the fulcrum effect so there shouldn't be any great stresses applied to the existing timber. The rotten timber should be removed first and the end of the joist treating to discourage any further rot.
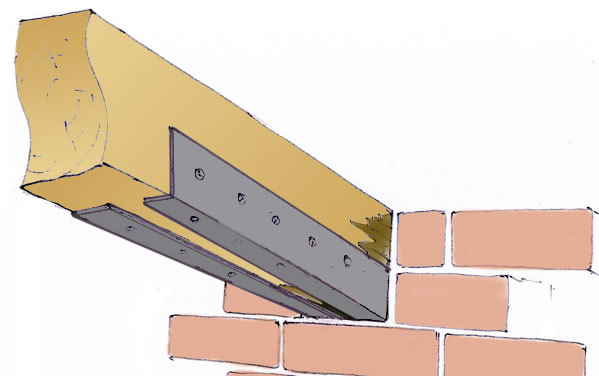
These plates are a quick and neat solution for joist ends that aren’t going to be seen. Different sizes are available to suit the joist section and the amount the joist will have to be cut back. Advise should be sort to determine the section required and the thickness of the steel used.
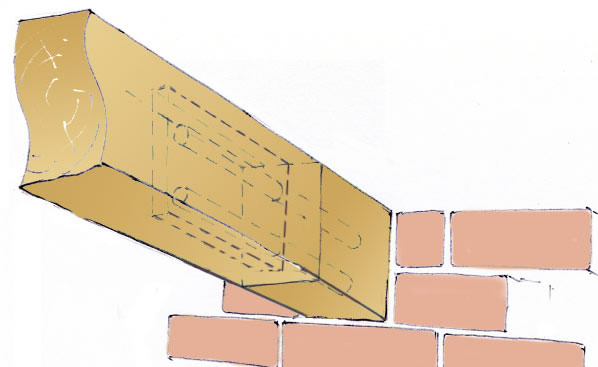
Problem fixing our joists /beams with joist repair plates – The two joists we needed to fix are exposed as part of the bathroom ceiling and they have moulded corners that would be covered by the plates. A different solution was required.
Timber – Resin Splice joist / beam repair
There are companies around that specialise in this kind of repair and I can see how it’s a technique that can be applied in a number of situations to good and economic al effect.
The rotten end of the beam / joist is cut off. A vertical slot is machined in the joist. A new joist end is drilled to so two or more steel bars can be glued (Resined) in. The new end is then fitted with the bars going in to slot. Resin is then poured in to the slot to secure the new beam end.
Why I didn’t choose Timber – Resin Splice - The main reason is that it all seems a bit complicated for something that should be simple. The materials are available in kit form for a DIY job but there are cheaper options for a repair of this nature. The Floor boards of the attic room would also need lifting to expose the top of the beam. So although it not really suitable for this job is a technique worth knowing about there are different problems with other structural timbers.
Scarf Joint Timber Joist repair.
This repair technique did get some serious consideration and nearly won out. It’s a traditional repair, is low cost and can be finished to match the original joist. The rotten joist end is cut off and an angle cut is made to bottom of the beam to allow a new part to be bolted on a good distance from the fulcrum point.

Why I didn’t choose a Scarf Joint Joist repair - A few reasons added up. It means removing quite a bit of timber that isn’t rotten including the edge moulding. I would have to source a couple of chunks of top quality, well seasoned pine. Yes the joists are pine which, being much softer than oak might not hold up to the pressure of the nut and bolt. It also needs accurate cutting of both side of the joint, although I suppose I shouldn't let that put me off.
So that’s how I didn’t repair them.
READ ON to see the full details of how I did repair the rotten Joist / beam ends.
For more about the Whitby Cottage Renovation/Restoration start here.
Any Comments or Questions about the Joist/Beam mending are most welcome over on the Blog. anywhere for now but I'll have a link here soon