

Carpentry / Woodworking - Raised Door Panels, without expensive router bits
This woodworking project can be scaled up or down to suit your carpentry project - new front doors, raised panels for kitchen units etc. All can be made without shelling out on expensive router bits.
Raised panels are fitted in to frames. It's a carpentry technique that been around for hundreds of years. The edge of a “thick” panel or board is reduced down so it can be fitted in to a rebate in the frame. This was before the age of manufactured boards like ply wood that have the strength to be thin enough to start with.
The simplest form of a raised timber panel
 This can be made easily by planing. The depth of the panel is reduced around the edge to fit a groove in the stiles, rails and muntins. The panels have to be inserted as the frames are assembled.
Modern raised panels
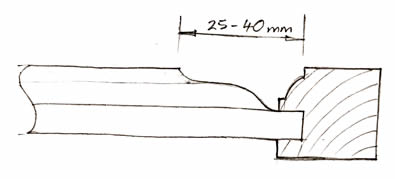
This variation normally needs some expensive tooling. For kitchen doors and furniture, a raised panel bit for a router will cost in the region of £30 + and only produce a moulding 25 – 40mm on to the panel. To produce what I wanted would need a spindle moulder (wood shaper) and tooling costing £300+.
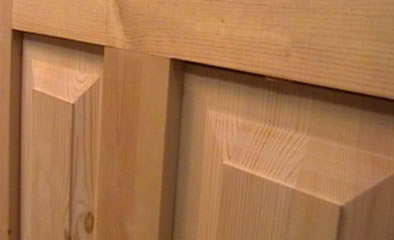
Deep Raised Panels for my new door
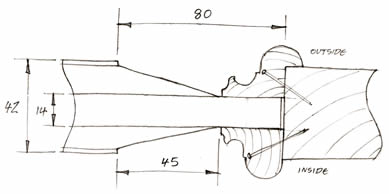
The design for my door needs chunky, deep panels. The design also call for custom mouldings around the panels so the rebate will be deep.
I've cut this custom raised panel with no specialist tooling, just a straight router bit. The only extra I needed was a quick home made jig.
Rather than groove or rebate to fit the panels is, I choose to fit them with applied moulding. This simplified the frame construction and gave the raised moulding I wanted.
Process for Custom Raised Panels
The process only need a few simple steps on the router.

-
Cut the flats to fit the rebate.
-
Cut the slope using the jig
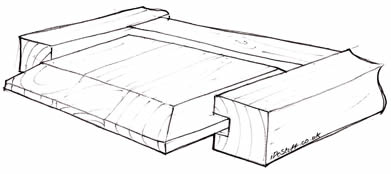
Straight router bit - Black. Jig - Grey
Jig For Raised Panel Router Cutting
The Jig provides a slope to router table bed. (If I had a flat piece of chipboard or ply I could have simplified the jig further) The panel slides along it at an angle to the cutter face.
I've incorporated a rail to butt against the router table table fence. The rail also supports the flat so the panel is firmly supported on both sides of the cutter.

Adjusting the height of the router bit and the fence gives full control of the profile being cut.
Video of the jig in action at the bottom of this page
Creative Raised Panels
If you wanted to be more creative. Have think what else could be done with some basic router bits, rounds and chamfers
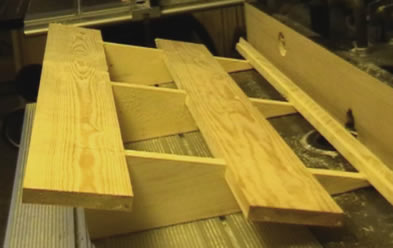
How To Joint Boards to Make Panels in the first place.
Start with boards planed flat. Have a look here for tips on How to Flatten boards.
The edges that will be joined need sawing flat and square. If your Table saw or band saw is set up right this shouldn't need any additional planing.
Rather than just butt joint the boards, I introduced a loose tongue. It's quick and easy to cut matching grooves on the router table or table saw. Then to cut of plane tongues to fit.
Video of the jointing boards at the bottom of this page
Glue and clamp together paying attention to the curves of the growth rings

Having opposing growth rings will cancel out the effects of cupping across the width of the board.
VIDEO of Raised Panel Moulding and How To Join Boards
The video shows both jointing the boards to make the panels and cutting the raised panels on a router table with a straight bit.
The next part covers: Making Custom Mouldings and Fitting Panels
Drop your comments here. Let me know what you think of these techniques.
How to Make a Timber New Front Door
Part 1. Timber Exterior Door Design
Part 2. DIY External Door Design and Proportions
Part 3. Tenon Theory and Cutting
Part 4. Mortise Marking and Cutting
Part 5. Fox Wedging Mortise and Tenon Joints
Part 6. Raised Panels on the cheap
Part 7. Routered Mouldings and Fitting