

Hand Hewn Timber Beam Retrofit Installation
Retro fitting a timber beam and column to support a floor in our Whitby Cottage Renovation / Restoration.
We’ve spent a lot of time so far carefully taking out everything that’s “not right” or has been causing problems. Apart from the damp, the roof, chimney and the cement render we found a major problem with the bathroom floor – To read more have a look at the Bathroom floor blog post-
The Unsupported Floor Problem
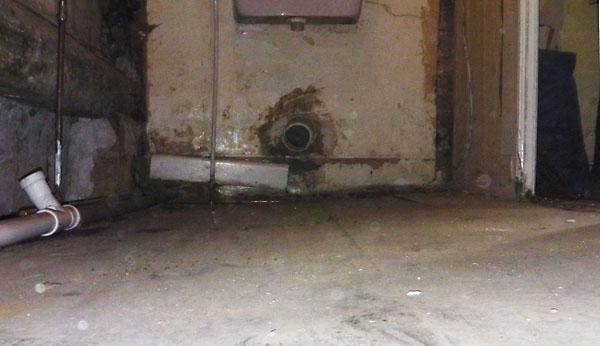 The result of this extremely weak floor support could have been disastrous if the cast iron bath had fallen through in to the passage way. It became clear a serious structural solution was required but not your average, everyday modern solution. After all it is the character of buildings construction that give it the charm we love.
Note: The wall is no use for structural support, it’s serverly bowed and won’t take any loading other than it’s own weight.
 The Solution - NEW Beam
We choose (with a bit advice from our friends on the period property uk forum) to make and fit an additional beam with a column in the middle to give extra support.
Both the beam and column, I hand hewed fresh from a tree. This page explains the process of hand hewing with an axe, froe and adze complete with video.
Next came the transport of 5.3m beam from the woodland to cottage. Read about my solution for transporting really long things over on the blog.
After all that the fitting seemed, at first glance, relatively simple. First Prep for the job then actually fit the new beam in place.
Preparation for Retrofitting the Structural Beam and Column
 First the floor of the bathroom and adjoining bedroom had to be taken up, after the layer of chipboard were Georgian tongue and grooved boards and under those some very rotten earlier boards. The wide Georgian boards came up well enough to be reused.
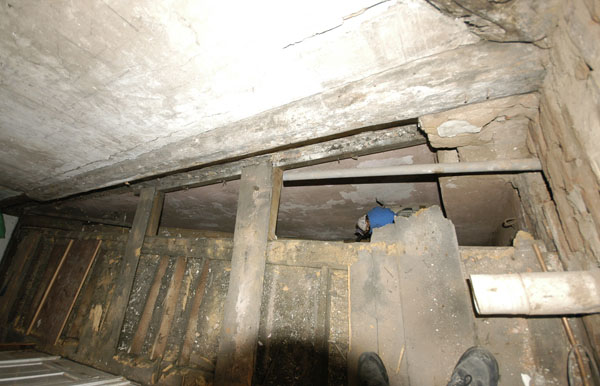
The dividing wall between the bathroom and bedroom had to come out, it was badly distorted with all the movement and had been roughly patched at some point.
 The plaster board that made a ceiling for the passage way was easily knocked down and the battens removed. Only one problem here as an old repair to the neighbours side of the passage dividing wall was only held in place by the last batten. It was already loose but my disruptions caused a gaping hole so the job got little bigger.
Read on for the details :
Retrofitting a Structural Beam and Column for Our Cottage Renovation
Including how to:
- Cutting And Fitting the beam to Suit the existing Walls
- Bedding the Beam in Place
- Footings / Foundation for the Column
- Cutting the Mortise and Tenon to join the Column to the Beam
- Cutting the mortise upside down
- Cutting and fitting the Tenon
- Concreting the base of the Column
Your comments, suggestions or question ar most welcome over on the blog
For more about the Cottage Renovation start here
To keep in touch with progress "like" the iDoStuff facebook page, link at top of this page.